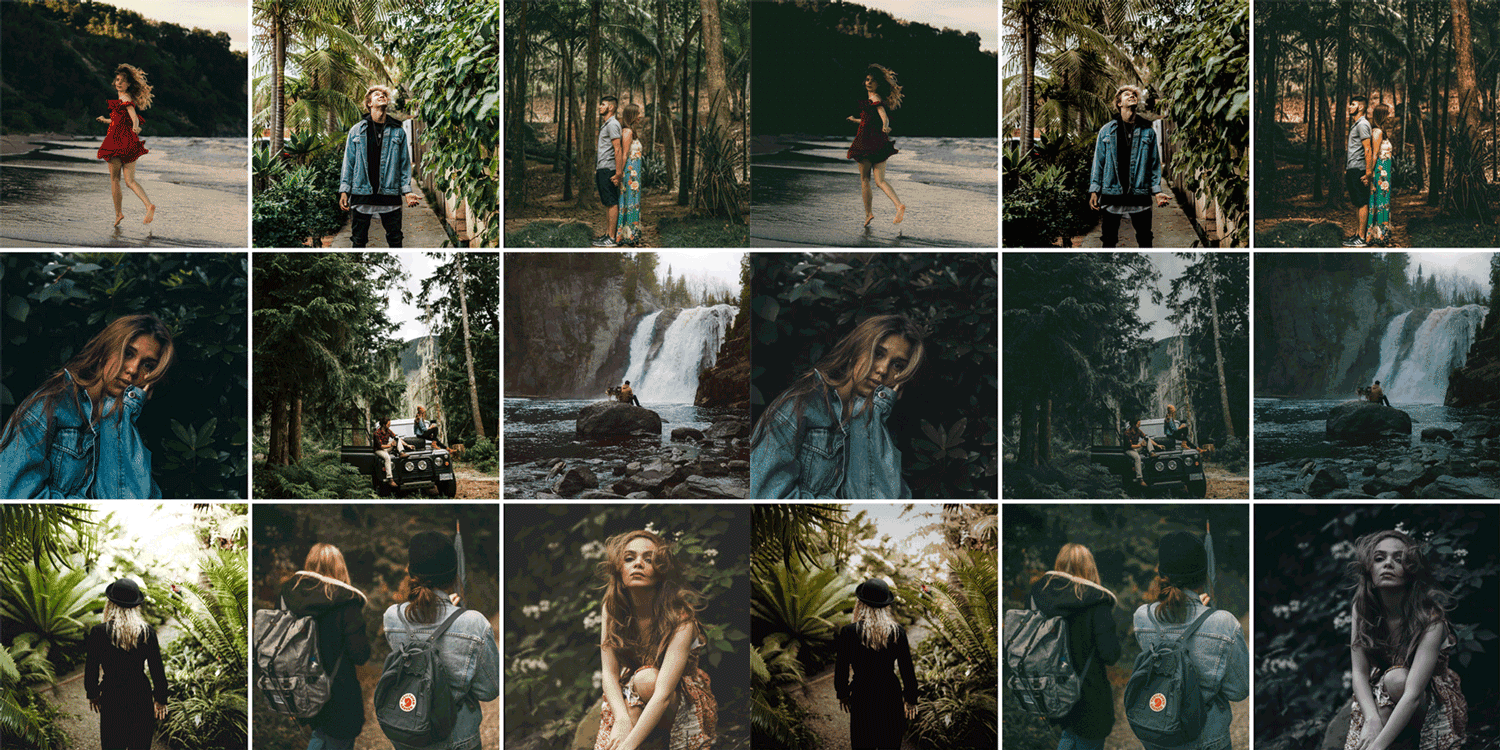
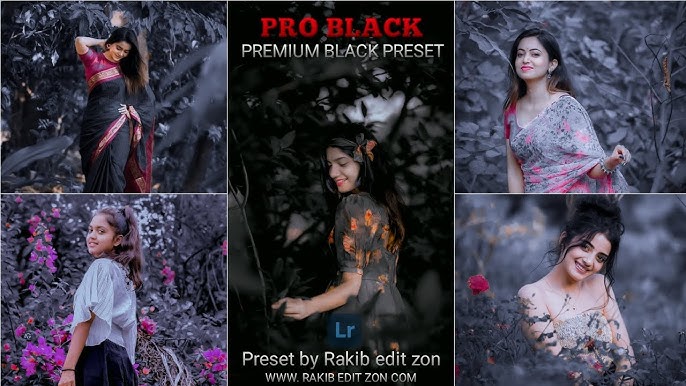
Introducing the Premium Dark Tone Free Lightroom Preset—your new go-to tool for transforming ordinary photos into stunning visual masterpieces. This preset is designed for photographers and enthusiasts alike who want to enhance their images with rich, moody tones and deep contrasts. Whether you’re capturing landscapes, portraits, or urban scenes, this preset will elevate your work, giving it a professional touch with just a single click. Perfect for those seeking a dramatic flair, the Premium Dark Tone Preset balances shadows and highlights beautifully, ensuring your photos stand out in any setting. Get ready to unleash your creativity and bring your vision to life!
What is the Lightroom app?
Adobe Lightroom is a powerful photo editing and management application designed for photographers and enthusiasts. It allows users to import, organize, edit, and share their photos seamlessly. With a wide range of tools and features, Lightroom provides options for adjusting exposure, color balance, and sharpness, as well as applying presets and filters for quick enhancements.
The app supports non-destructive editing, meaning you can make adjustments without permanently altering the original image. Available on both desktop and mobile devices, Lightroom also offers cloud storage, enabling users to access their photos and edits from anywhere. It’s a popular choice for both amateur and professional photographers looking to streamline their workflow and create stunning visuals.
How To edit in lightroom?
Editing in Adobe Lightroom is a straightforward process, whether you’re using the desktop or mobile version. Here’s a step-by-step guide to get you started:
1. Import Your Photos
- Open Lightroom and click on the Import button.
- Select the photos you want to edit from your computer or device.
- Choose where to store them (in the cloud, on your hard drive, etc.) and click Import.
2. Organize Your Photos
- Use collections, folders, or keywords to categorize your images for easier access.
3. Select a Photo to Edit
- Click on the photo you want to edit from your library.
4. Basic Adjustments
- Develop Module: Switch to the Develop module (or use the editing tools in the mobile app).
- Basic Panel: Adjust exposure, contrast, highlights, shadows, whites, and blacks to enhance overall tone.
- White Balance: Adjust the temperature and tint for a more natural look.
5. Enhance Colors
- HSL/Color Panel: Modify the hue, saturation, and luminance of specific colors to make them pop.
- Split Toning: Add color tones to the highlights and shadows for creative effects.
6. Detail Enhancements
- Sharpening: Apply sharpening to enhance details.
- Noise Reduction: Reduce noise in low-light images to smooth out grain.
7. Effects and Finishing Touches
- Post-Crop Vignetting: Add a vignette effect to draw attention to the center of the photo.
- Grain: Add a film grain effect for a vintage look.
8. Use Presets
- Apply built-in presets or your own custom presets for a consistent style across multiple photos.
9. Crop and Straighten
- Use the Crop tool to adjust the composition and straighten horizons.
10. Export Your Edits
- Once you’re satisfied with your edits, click on the Export button.
- Choose the file format, quality, and destination for your edited photo.
Read more: Ai Se Photo Editing Kaise Kare?
Tips:
- Experiment with different adjustments and use the Undo feature if you don’t like a change.
- Save your edits as presets for future use.
- Regularly back up your Lightroom catalog and photos to avoid losing your work.
With practice, you’ll find your own style and workflow, making Lightroom a powerful tool for elevating your photography!
What is Preset Editing?
Preset editing in Lightroom refers to the use of pre-defined adjustments that can be applied to photos with a single click. These presets are essentially collections of editing settings that affect various aspects of an image, such as exposure, contrast, color balance, and more. Here’s a closer look at what preset editing involves:
1. Time-Saving
- Presets streamline the editing process by allowing you to quickly apply a specific look or style to your photos, making it especially useful for batch editing.
2. Consistency
- Using the same preset across multiple images helps maintain a cohesive aesthetic, which is particularly beneficial for projects like portfolios or social media feeds.
3. Customization
- While presets offer a starting point, they can be adjusted further after application to suit your specific vision. You can fine-tune individual settings to better fit each photo.
4. Variety
- There are countless presets available, ranging from subtle enhancements to dramatic effects, allowing you to experiment with different styles and moods.
5. Creating Your Own Presets
- You can save your own custom settings as presets, enabling you to apply your unique style effortlessly to future images.
6. User-Friendly
- Presets are great for beginners who may not be familiar with all the editing tools, providing an easy way to achieve professional-looking results.
In summary, preset editing is a powerful feature in Lightroom that enhances your workflow, allows for creative experimentation, and helps achieve a polished look across your photography.
How do you use presets in the Lightroom mobile app?
Using presets in the Lightroom Mobile app is a simple and effective way to enhance your photos quickly. Here’s how to do it:
1. Install Lightroom Mobile
- Make sure you have the Lightroom app installed on your mobile device. You can download it from the App Store or Google Play.
2. Import Your Photos
- Open the app and tap on the Add Photos icon.
- Select the photos you want to edit from your camera roll or gallery.
3. Access the Edit Menu
- Tap on the photo you wish to edit to open it.
- Then, tap the Edit icon (represented by sliders).
4. Apply Presets
- Look for the Presets tab in the edit panel.
- You’ll see a list of built-in presets and any custom presets you’ve imported or created.
- Tap on a preset to apply it to your photo. You can preview how it looks before finalizing.
5. Adjust After Applying
- After applying a preset, you can further tweak individual settings like exposure, contrast, and color balance to better fit your photo.
6. Save Your Edits
- Once you’re satisfied with the look, tap the Checkmark or Done to save your changes.
7. Export or Share
- To export your edited photo, tap the Share icon, and choose your desired format and destination.
Tips:
- Create Your Own Presets: If you find a particular style you like, you can save it as a preset. Tap on the three dots (or the preset options) and choose Create Preset.
- Explore Community Presets: Many photographers share presets online. You can download these and import them into your app for more variety.
Using presets in Lightroom Mobile can enhance your editing efficiency and help you achieve consistent results across your photography!


How to Download Premium Dark Tone Preset?
To download the Premium Dark Tone Preset, follow these general steps:
1. Find the Source
- Look for a website or platform that offers the Premium Dark Tone Preset. This could be a photography blog, a preset marketplace, or a creator’s personal site.
2. Sign Up or Subscribe (if required)
- Some sites may require you to sign up or subscribe to their newsletter to access free or premium presets.
3. Download the Preset
- Locate the download button or link for the Premium Dark Tone Preset.
- Click on it, and the preset file (usually in .dng or .xmp format) will begin downloading to your device.
4. Import into Lightroom
- For Lightroom Mobile:
- Open the app and go to the Presets section in the editing panel.
- Tap on the three dots (or the preset options) and select Import Presets.
- Navigate to the downloaded preset file and select it to import.
- For Lightroom Desktop:
- Open Lightroom and go to the Develop module.
- In the Presets panel, right-click on the folder where you want to add the preset.
- Select Import, navigate to the downloaded preset file, and click Import.
5. Apply the Preset
- Once imported, you can easily apply the Premium Dark Tone Preset to any photo in your library.
Tips:
- Always check the site’s credibility before downloading to ensure you’re getting quality content.
- Read any instructions provided with the preset, as some may have specific guidelines for optimal use.
Enjoy enhancing your photos with the Premium Dark Tone Preset!
Frequently Asked Questions
What is the Premium Dark Tone Free Lightroom Preset?
The Premium Dark Tone Free Lightroom Preset is a pre-defined set of editing adjustments designed to enhance photos with rich, moody tones and deep contrasts, ideal for achieving a dramatic look.
Is this preset really free?
Yes, the Premium Dark Tone Preset is offered for free, although some platforms may require you to sign up or subscribe to access it.
How do I download the preset?
You can download the preset from the website or platform offering it. Look for a download button, and follow the prompts to save the file to your device.
In what format is the preset available?
The preset is usually available in .dng or .xmp format, which can be easily imported into Lightroom on both desktop and mobile versions.
How do I install the preset in Lightroom?
For Lightroom Mobile, go to the Presets section, tap on the three dots, and select Import Presets. For Lightroom Desktop, right-click on the Presets panel and select Import.
Can I customize the preset after applying it?
Absolutely! After applying the preset, you can adjust individual settings like exposure, contrast, and color balance to better suit your photo.
What types of photos work best with this preset?
The Premium Dark Tone Preset is versatile but works particularly well with portraits, landscapes, and urban scenes where you want to create a moody atmosphere.
Can I use this preset on multiple photos?
Yes, you can apply the preset to any number of photos. It’s great for batch editing to achieve a consistent look across a series of images.
Conclusion
The Premium Dark Tone Free Lightroom Preset is an invaluable tool for photographers looking to elevate their editing game. With its ability to transform ordinary images into striking visuals characterized by rich tones and deep contrasts, this preset is perfect for a variety of styles—from dramatic portraits to atmospheric landscapes. Its user-friendly nature allows both beginners and experienced photographers to achieve professional-looking results with ease.
By downloading and applying this preset, you can save time while maintaining a consistent aesthetic across your work. Plus, the flexibility to customize adjustments further enhances its appeal. Whether you’re enhancing your portfolio or sharing images on social media, the Premium Dark Tone Preset is a fantastic addition to your editing toolkit. Embrace your creativity and let this preset help you bring your artistic vision to life!


